
- Go to System, then System Setup.

- Click on the Sales tab, then General.
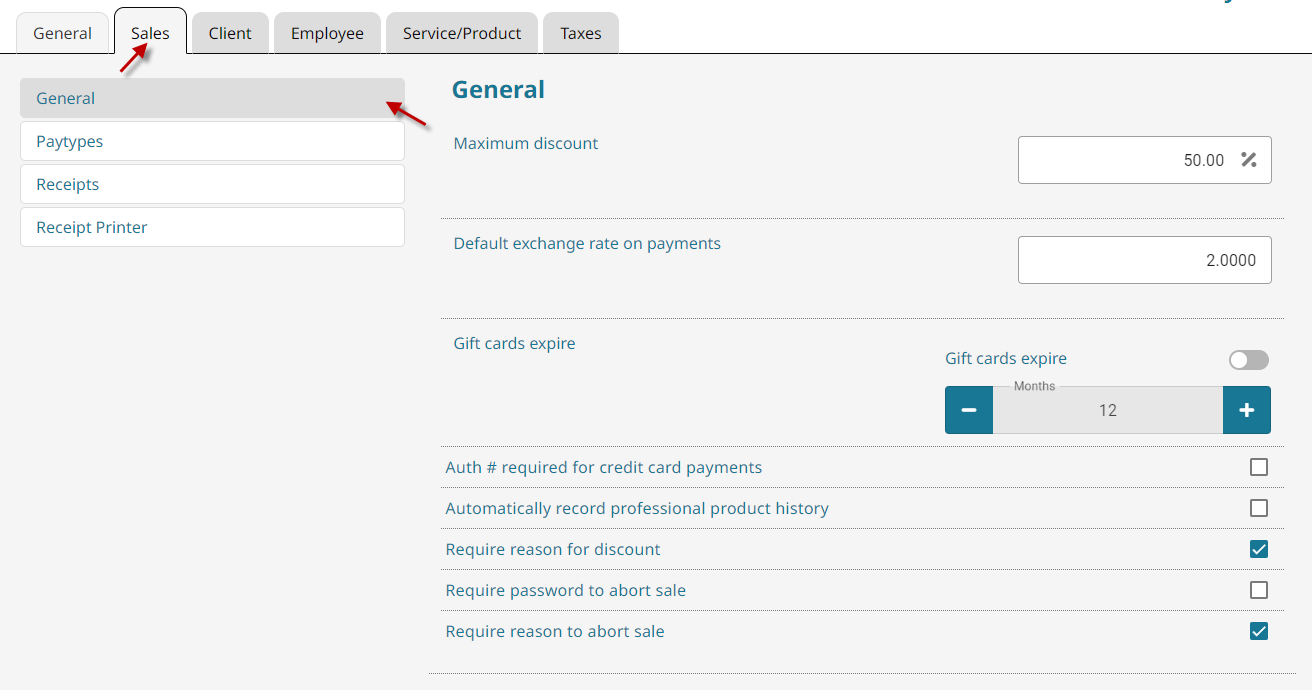

- Maximum Discount: Set the maximum you would allow someone to be discounted.
- Default exchange rate: The default currency exchange for foreign currency.
- Gift cards expire: Set a default expiry duration for all gift cards.
- Auth # required for credit card payments: Requires that a valid authorization number is entered to add a credit card payment into the system.
- Automatically record professional product history: Records product usage on services (if set up for that service) automatically.
- Require reason for discount: Requires an employee enters a reason/note for discounting a product or service.
- Require password to abort sale: An employee is required to enter their password to use the abort functionality.
- Require reason to abort sale: Requires an employee enters a reason/note for aborting an invoice.
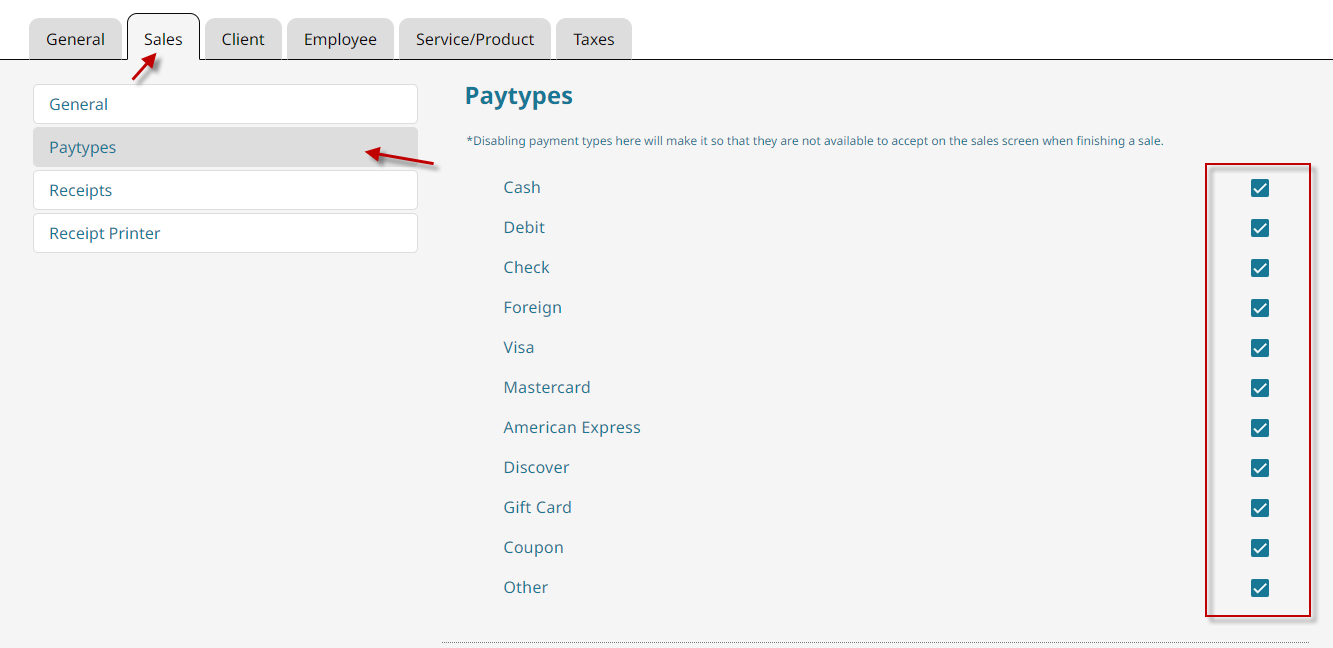
This section can enable or disable specific pay types (credit card, cash, debit, etc.)
- Go to System, then click on System Setup.
- Click the Sales tab, then click the Paytypes button.
- Go to System, then click on System Setup.
- Click the Sales tab, then click the Receipts button.
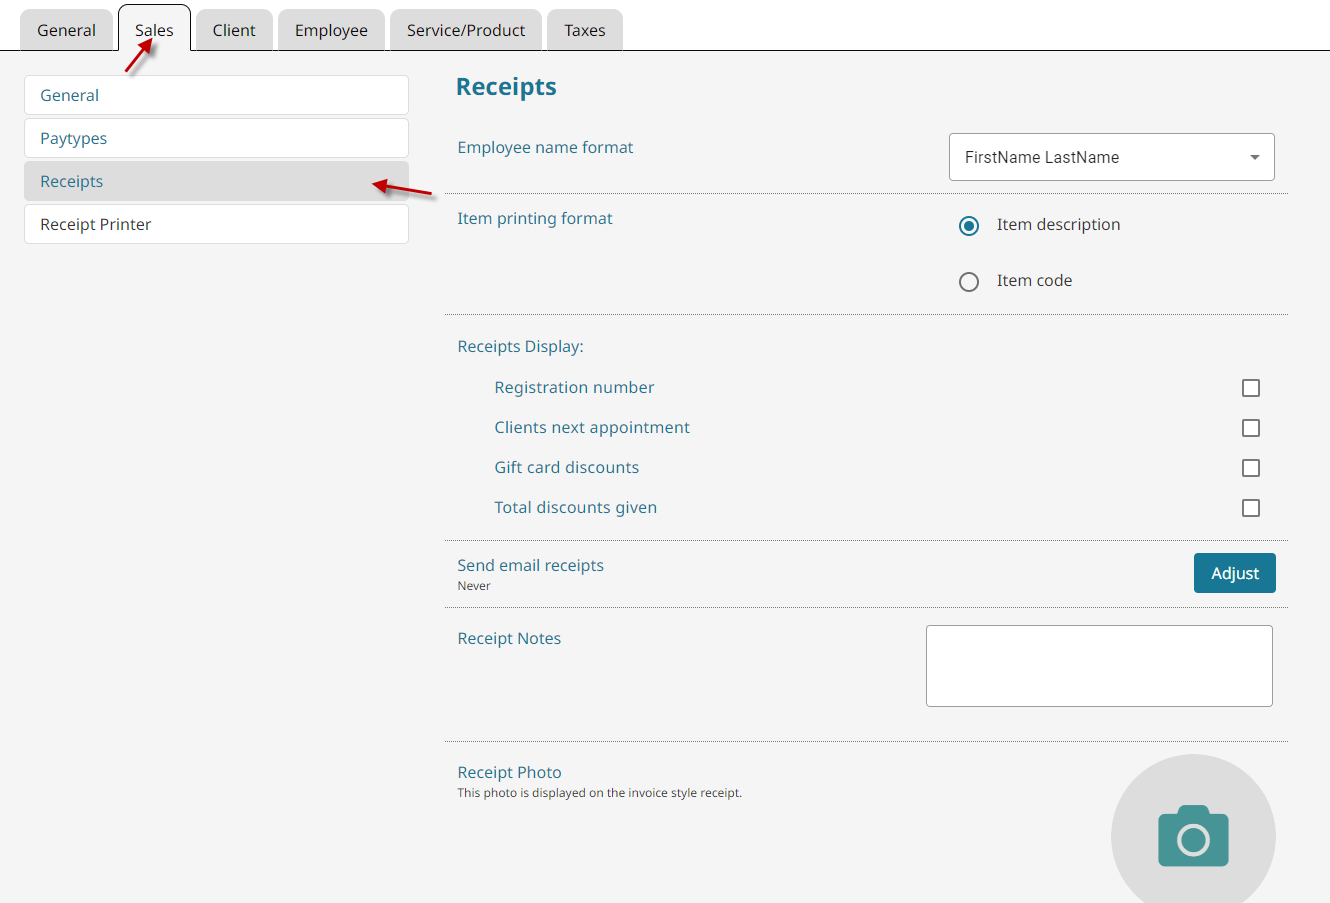
- Employee name format: The way the employee name appears on the receipts.
- Item printing format: Choose between printing the item code or the item description on the receipt.
- Receipts Display: Allows the display of certain information on the receipts. Such as:
- Registration number
- Client’s next appointment
- Gift card discounts
- Total discounts
- Receipt notes: Add an additional note to the bottom of the receipt.
- Receipt photo: Add a picture to the top of the receipt.
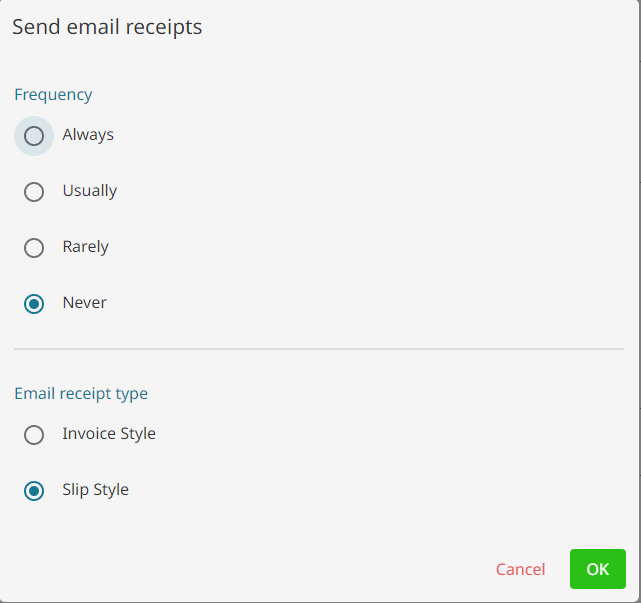
Email Receipts #
- Go to System, then click on System Setup.
- Click the Sales tab, then click the Receipts button.
- Clicking on the Adjust button gives the options for receipt emailing.
- Select the preferred send frequency and receipt style to be emailed.

- Go to System, then click on System Setup.
Click the Sales tab, then click the Receipt Printer button.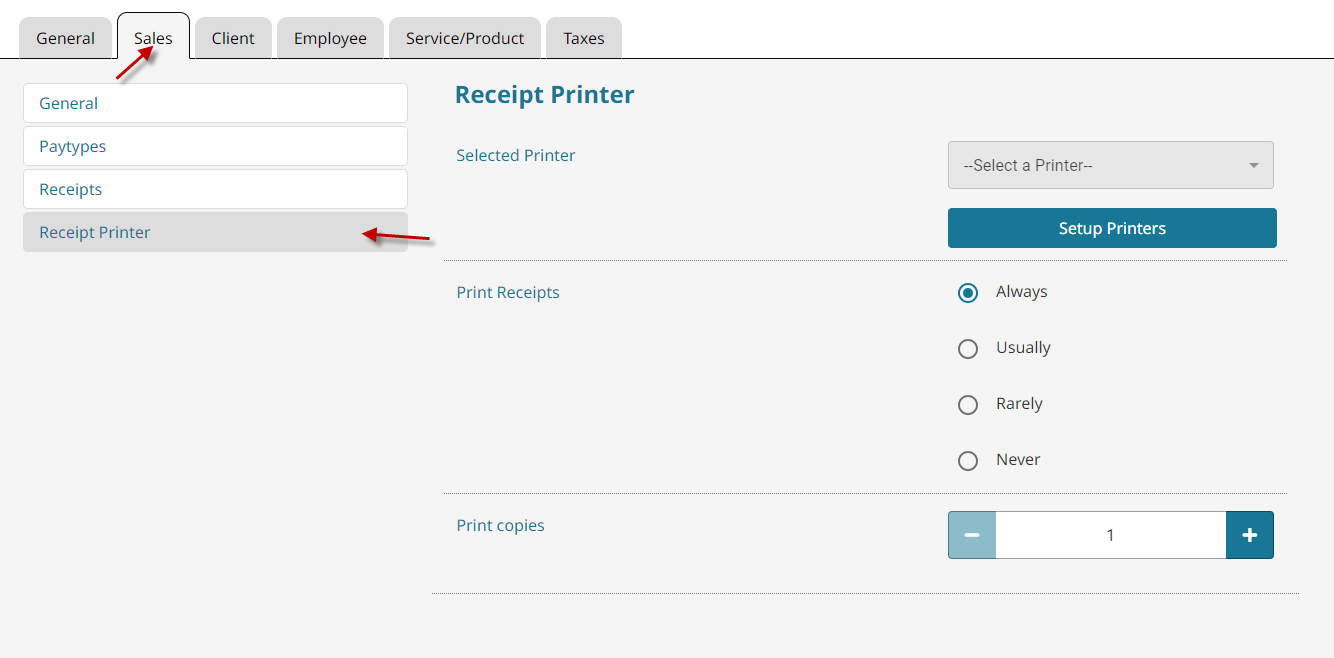
Selected Printer:
Set the printer that is to receive receipt print jobs.
If there are no printers to select, do the following:
- Click Setup Printers button.
- Download and install the utility in order to allow for direct receipt printing.
- After installing that program, click Check Again.
- Fill in the required information from the following screen.
- Click Setup Printers button.


Print Receipts
Select when you would like the system to print a receipt.
- Always: Always prints at the end of a sale.
- Usually: Gives the option to print with the Yes highlighted by default.
- Rarely: Gives the option to print with No highlighted by default.
- Never: Never prints a receipt automatically.
Print copies
- How many copies of the receipt will print every time.


