Screen Timeout #
This section allows you to set an idle timeout duration for the program. If the program is idle for the set amount of time, a password would be required to perform any new actions.
- Go to System, then System Setup.

- Click on the General tab.
- Click the System button.
- Set the screen timeout in minutes.

- Click Save.

Automatic Appointment Confirmations #
This section tells the program the minimum timeframe needed for an appointment to be considered confirmed by default.
- Go to System, then System Setup.

- Click on the General tab.
- Click on the Appointments button.
- Enable Automatically confirm appointments within, and set the hour timeframe.

- Click Save.

List Sorting #
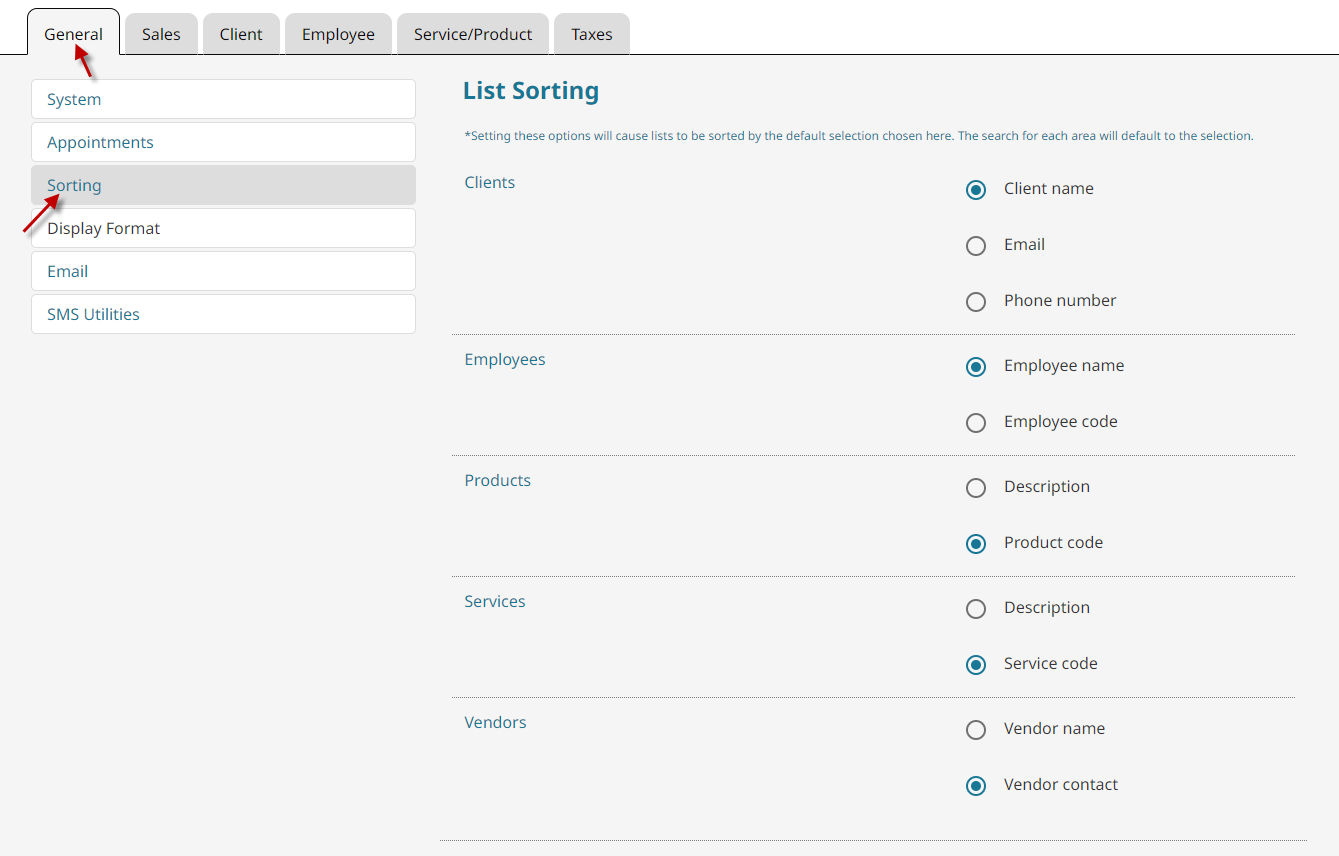
This section allows you to dictate the default sorting method for clients, employees, products, services and vendors.
- Go to System, then System Setup.

- Click on the General tab.
- Click the Sorting button.

- Set your preferred default sorting method for the Clients, Employees, Products, Services and Vendors.
- Click Save.

Name Formats #
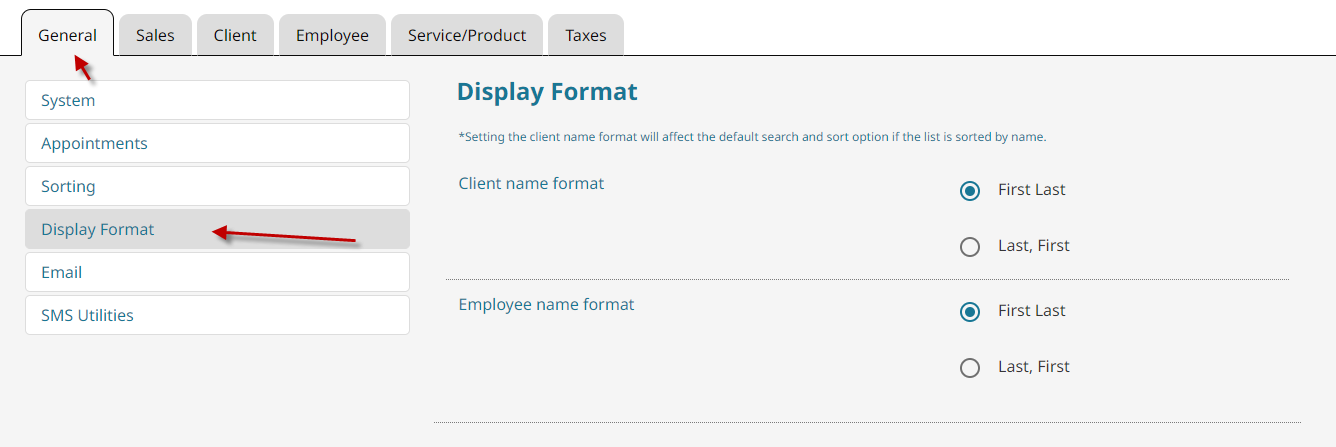
Allows you to determine whether employees and clients should be sorted by first name or last name.
- Go to System, then System Setup.

- Click on the General tab.
- Click the Display Format button.

- Set your preferred format for both Client and Employee names.
- Click Save.

Email Setup #
- Go to System, then System Setup.

- Click on the General tab.
- Click the Email button.

- Type the name you want your clients to see.
- Type the email you want your clients to be able to reply to.
An email will be sent to verify the address entered. - Once it’s set up properly, your email should show as verified.
- Click Save.

SMS/Text Messaging Setup #
- Go to System, then System Setup.

- Click on the General tab.
- Click the SMS Utilities button.
- Request an SMS number. A dedicated number will be assigned to your business.

- Optional: Create a confirmation statement you want your clients to reply with. (“Y”, “C”, “Yes”, “Confirm” or “OK” all work by default.)
- Click Save.


