window.dataLayer = window.dataLayer || []; function gtag(){dataLayer.push(arguments);} gtag('js', new Date()); gtag('config', 'UA-206511945-1');
Search

Appointment Book Display Options

The display options allows you to customize the look and feel of your appointment book. Including colors, intervals, visible employees, resources, zoom, etc.
Add/Edit a Display Option #

  1. Go to the Appointments Button on the main menu.
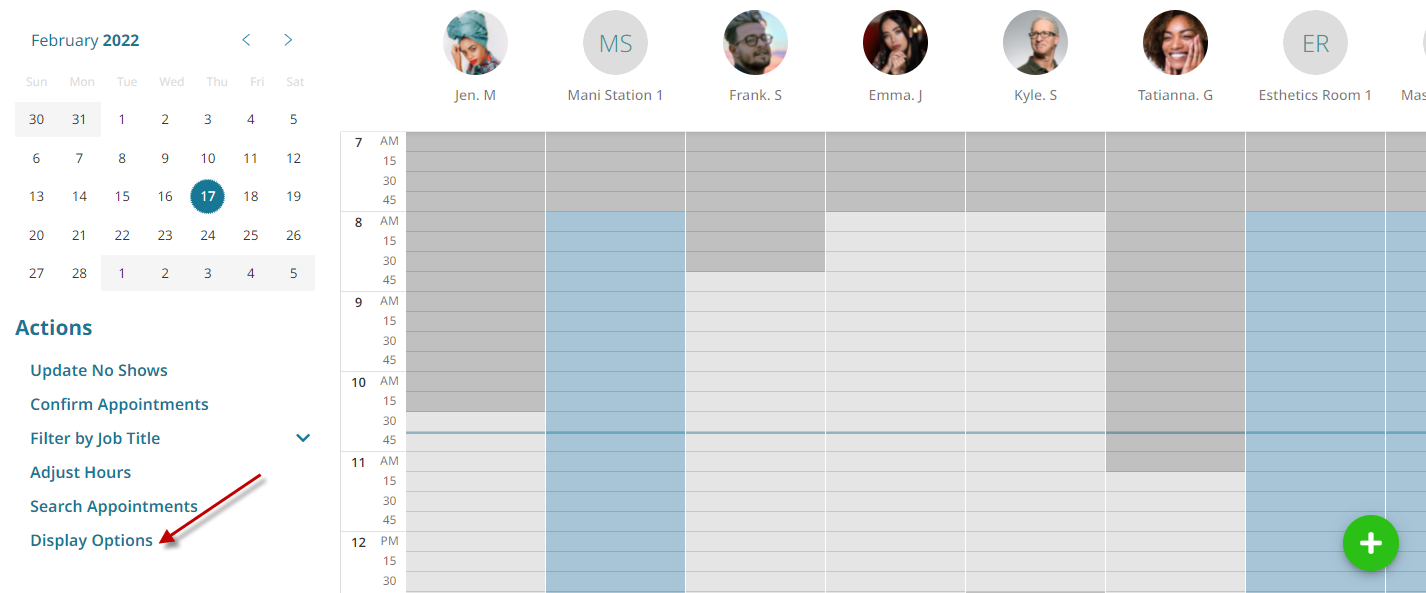
  2. Click Display Options.
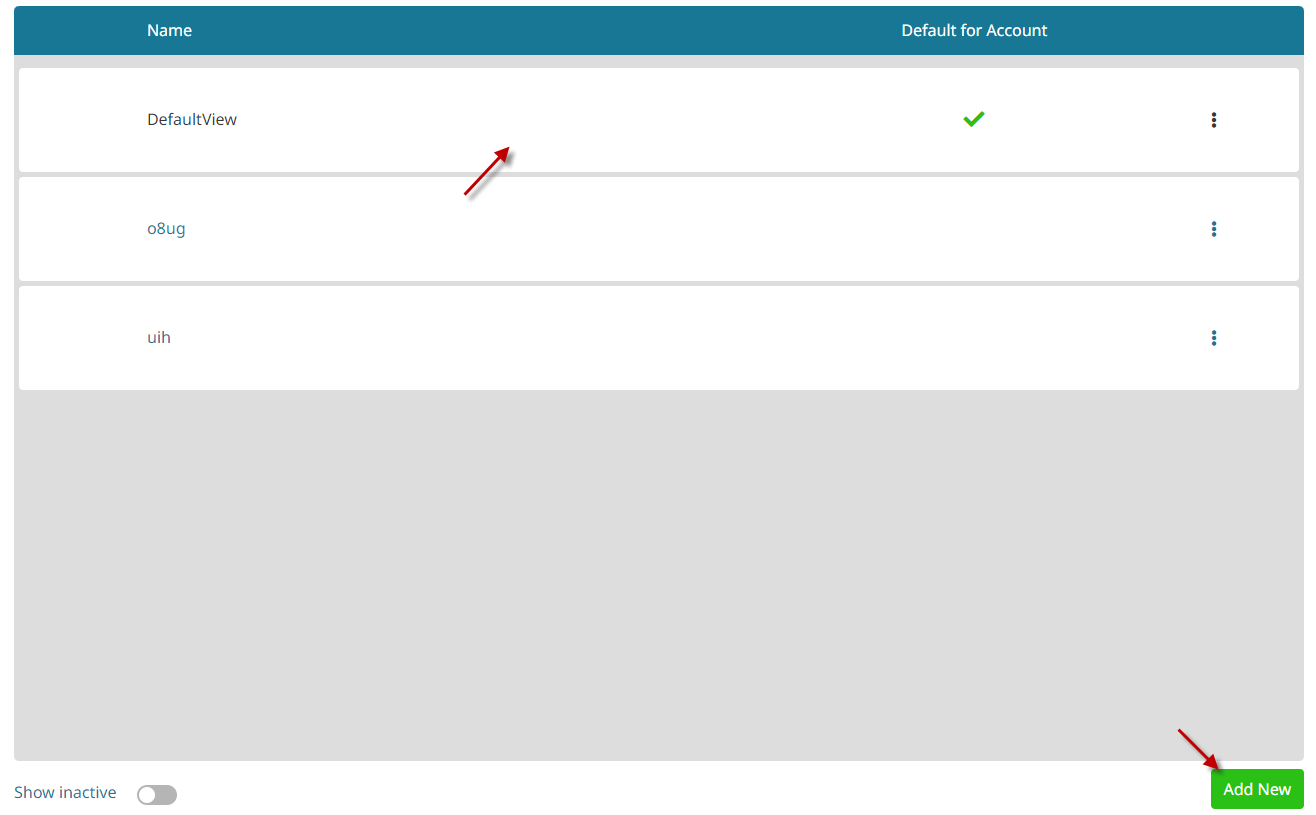
  3. Click on the display option to edit, or click the Add New button.
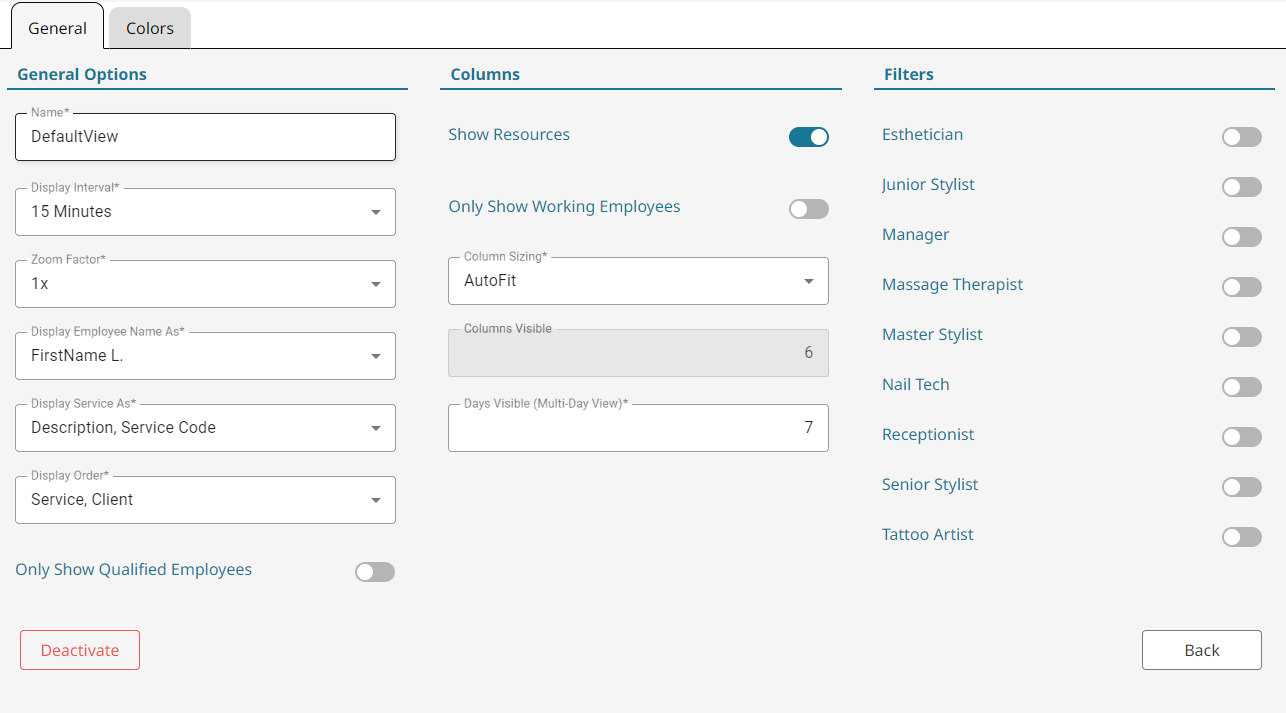
  4. Click the General tab to change who shows on the appointment book and appointment book intervals.
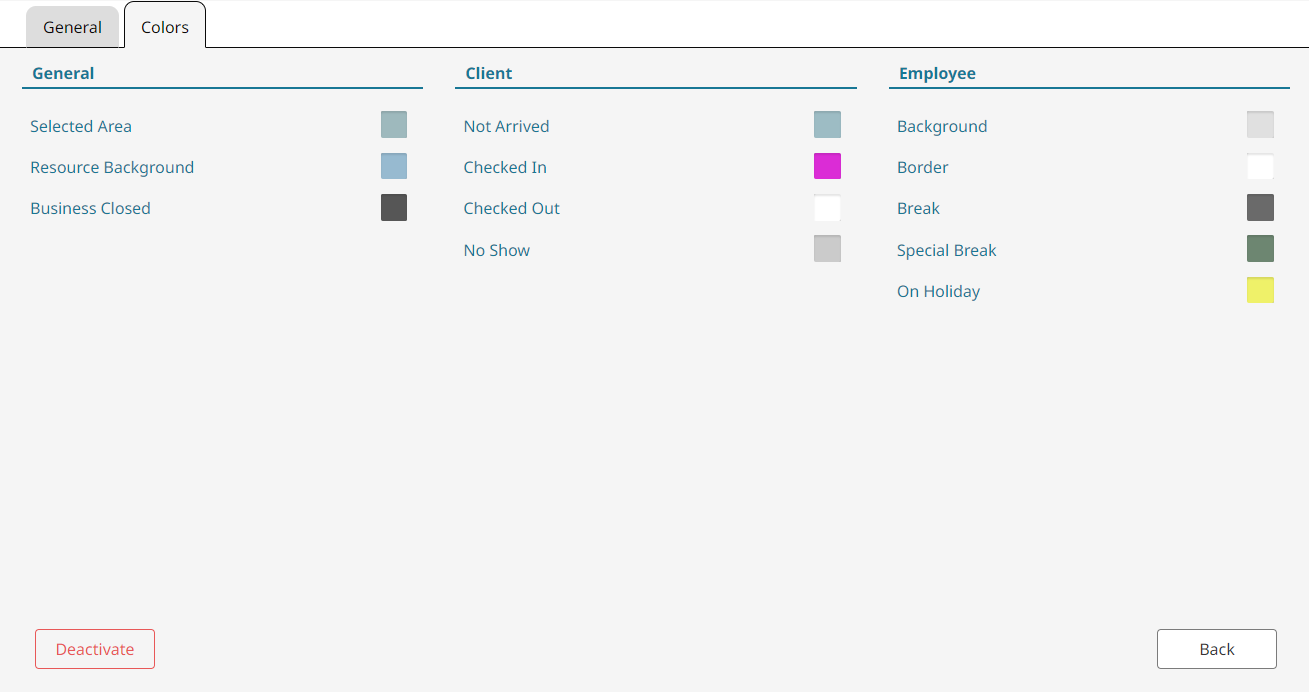
  5. Click on the Colors tab to change the colors of your appointment book.

Change the Active Display Option #

  1. Go to the Appointments Button on the main menu.
  2. Click Display Options.
  3. Set the preferred display option by clicking the more button, and selecting Use.

How to Change Column/Employee Order #

  1. Go to Appointments area.
  2. Go to Display Options.
  3. Click on the active display option.
  4. Click on the Order tab.
  5. Drag and drop each employee to change the order they will appear on the appointment book.

Note: The person listed at the top will appear in the first column, while the person at the bottom will be in the last column.

Video - Appointment Book Display Options #

Video Contents:

  • Changing appointment book time intervals
  • Setting visual options such as zoom, name display order and colors
  • Show/hide appointment resources
  • Show/hide employees who are not working
  • Column sizing
Did this article help you?
Updated on October 21, 2024